
Arduino & IoT
Internship
for Connected Systems
Build practical Arduino and IoT skills through a structured 4-week internship covering programming, sensors, ESP8266, Wi-Fi, networking and cloud-connected applications.
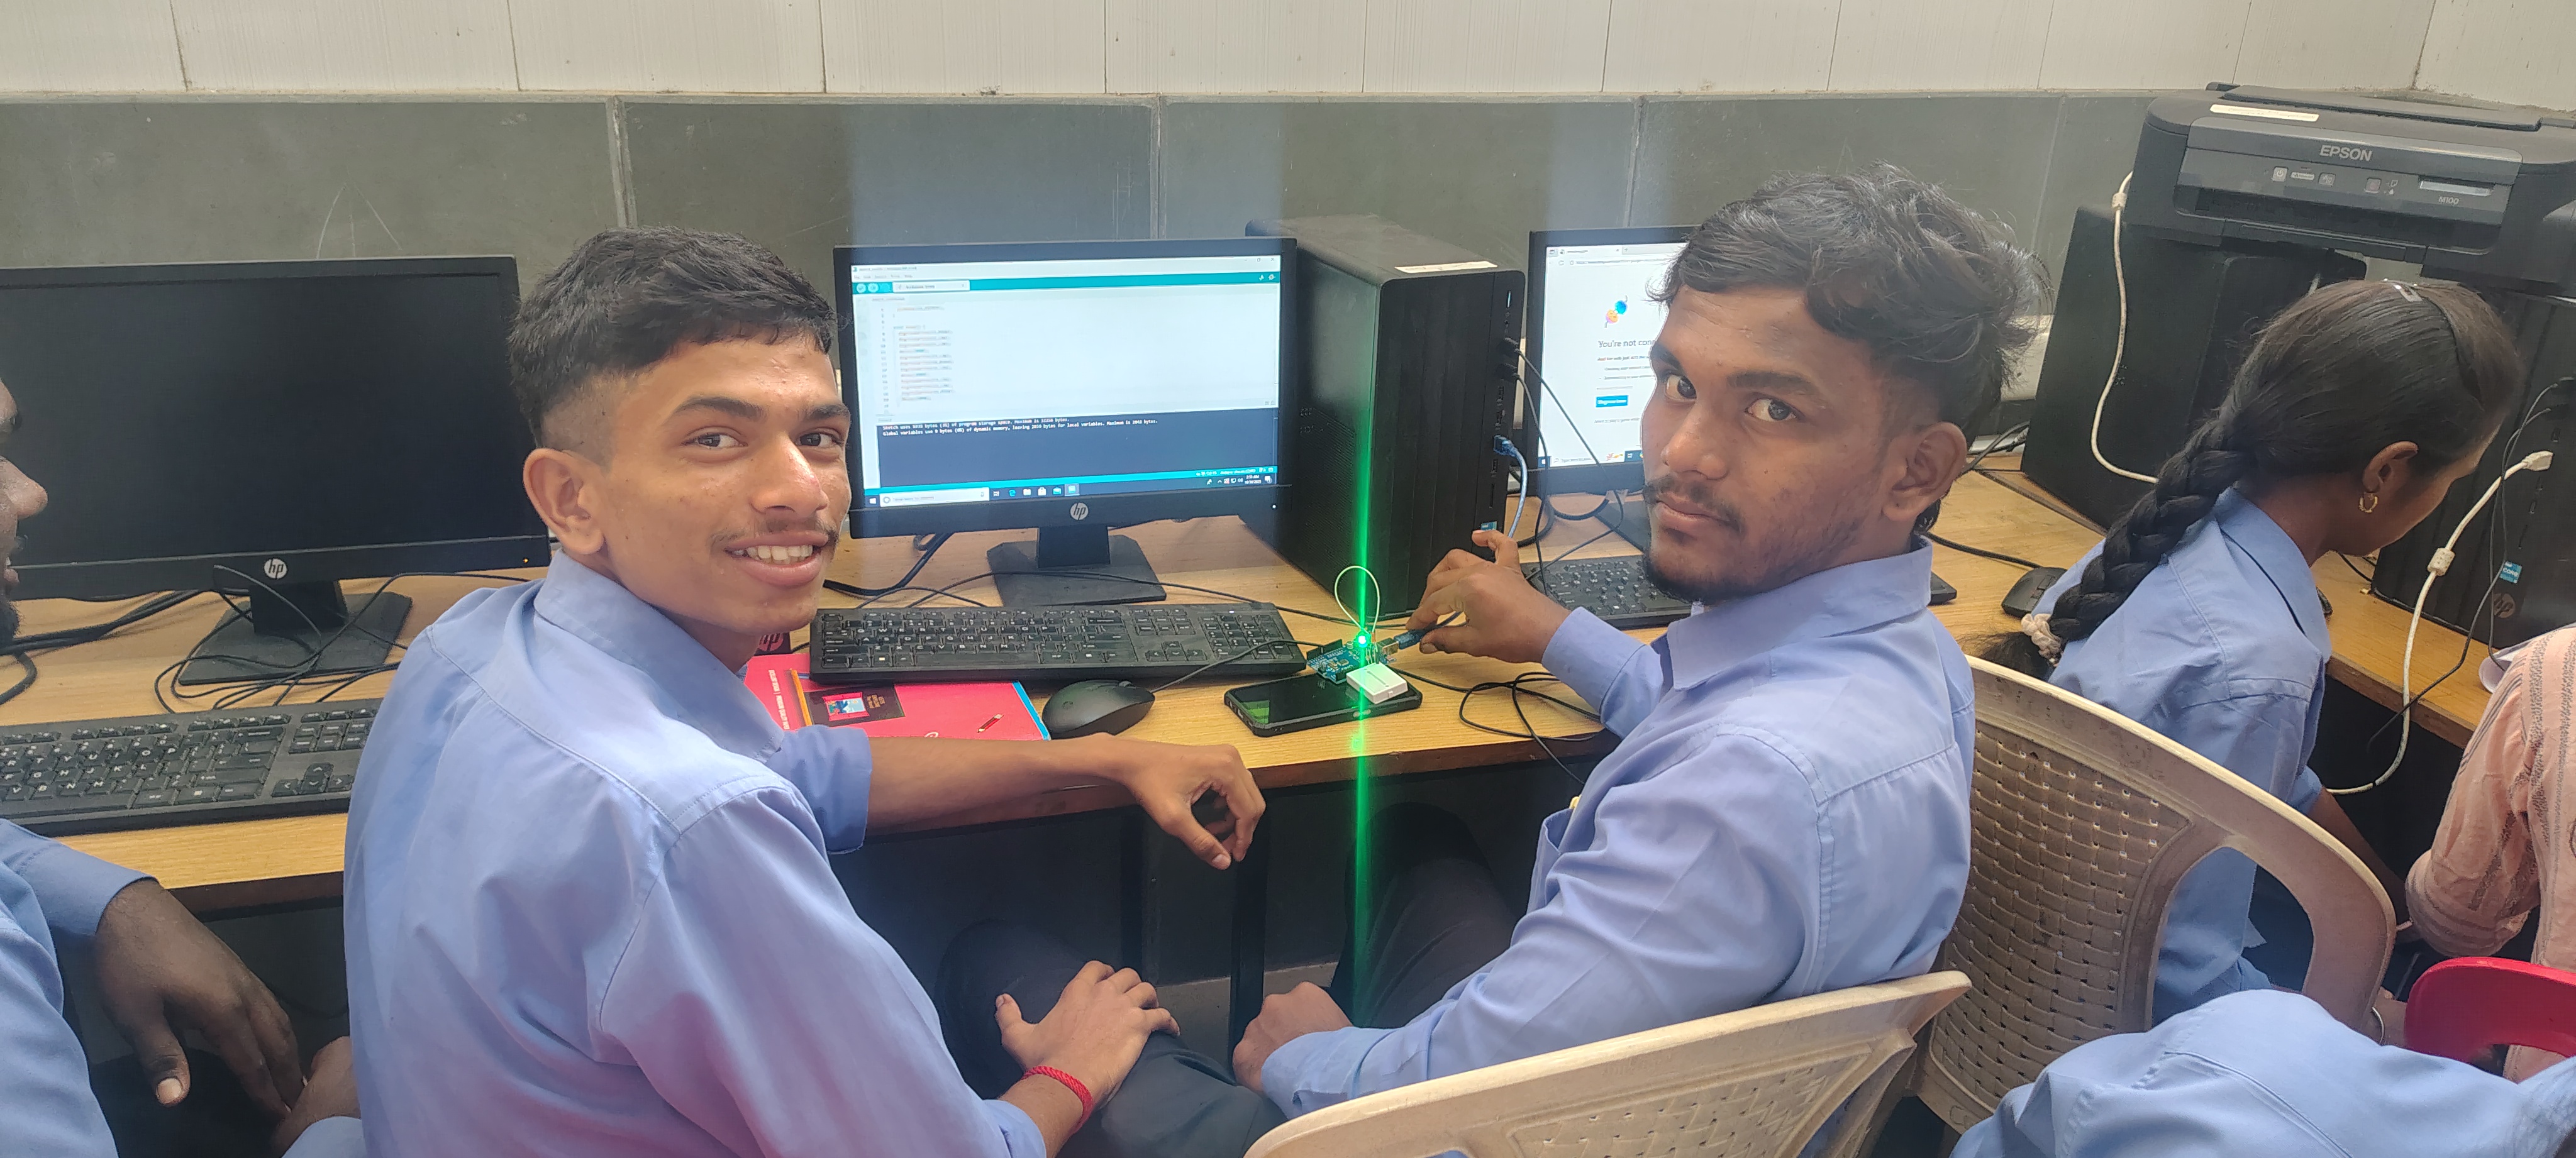
Learn by building. Practical Arduino and IoT training with sensors, ESP8266 and project-based learning.
Students from leading engineering institutions
learn with Make IoT
Students and learners from universities and autonomous engineering colleges have participated in Make IoT's technical workshops and programs.
Build the skills.
Show the work.
A structured four-week internship that starts with Arduino fundamentals and progresses to ESP8266, IoT networking, web servers and cloud platforms through practical learning.
Structured internship
Labs & projects
IoT development
One-time fee
Turn your work into something you can showcase.
Build evidence of what you learned — not just a line on a certificate.
Add the internship experience to your resume.
Showcase completed projects in your portfolio.
Share your projects and learning journey on LinkedIn.
Discuss your project work during technical interviews.
From embedded fundamentals.
Build what works.
A structured 4-week internship covering Arduino Programming, Arduino microcontroller programming, peripherals, communication protocols, simulation and practical project work.
Structured learning • Practical exercises • Project-based application
From Arduino.
Into connected IoT.
Learn the development workflow from writing Arduino sketches to simulating circuits, connecting an ESP8266 and sending data to IoT platforms.
Arduino IDE
Write Arduino sketches, compile your code and understand the basic Arduino development workflow.
Wokwi Simulation
Simulate Arduino and IoT circuits and firmware before working with physical hardware.
ESP8266 / NodeMCU
Move from basic Arduino applications to Wi-Fi-enabled IoT systems using ESP8266 and NodeMCU.
IoT Cloud Platforms
Work with Arduino IoT Cloud, ThingSpeak Cloud and Blynk IoT Cloud to connect and visualise IoT data.
// ESP8266 Wi-Fi connection
// Device → Network → IoT platform

WiFi.begin(SSID, PASSWORD);  // connect to Wi-Fi

while (WiFi.status() != WL_CONNECTED) {
  delay(500);
}

// Read sensor data
int value = analogRead(A0);
// Send data to an IoT cloud platform
Arduino
Start with programming, GPIO, sensors, actuators and serial monitoring.
IoT
Continue into Wi-Fi, TCP/IP, HTTP, web servers and cloud-connected applications.
Get the documents.
Keep the proof.
Complete your internship with formal documentation that you can submit to your college, add to your resume and showcase as part of your professional profile.
Internship Document
Internship Offer Letter
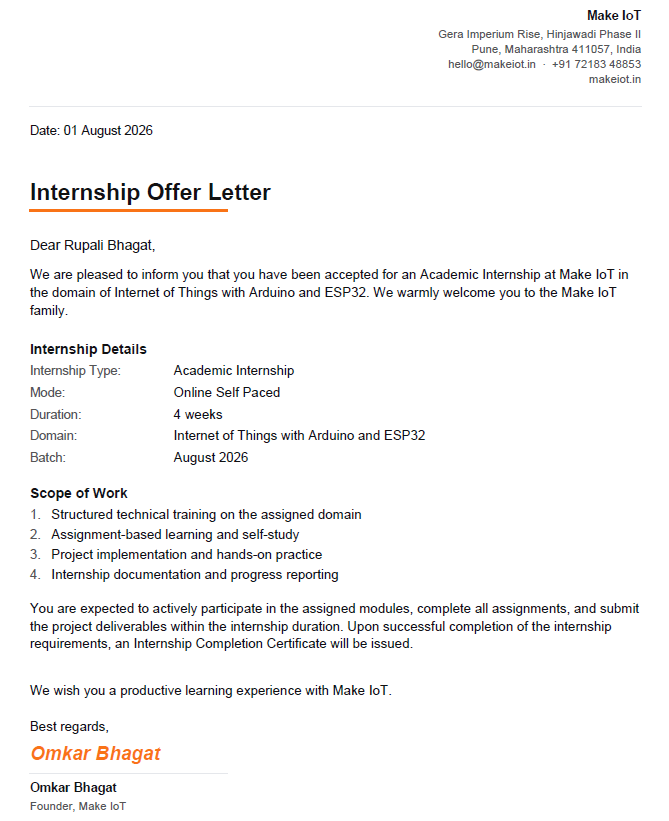
Issued as part of your enrollment
Receive your internship offer letter as part of your program documentation after successful enrollment.
Internship Document
Completion Certificate
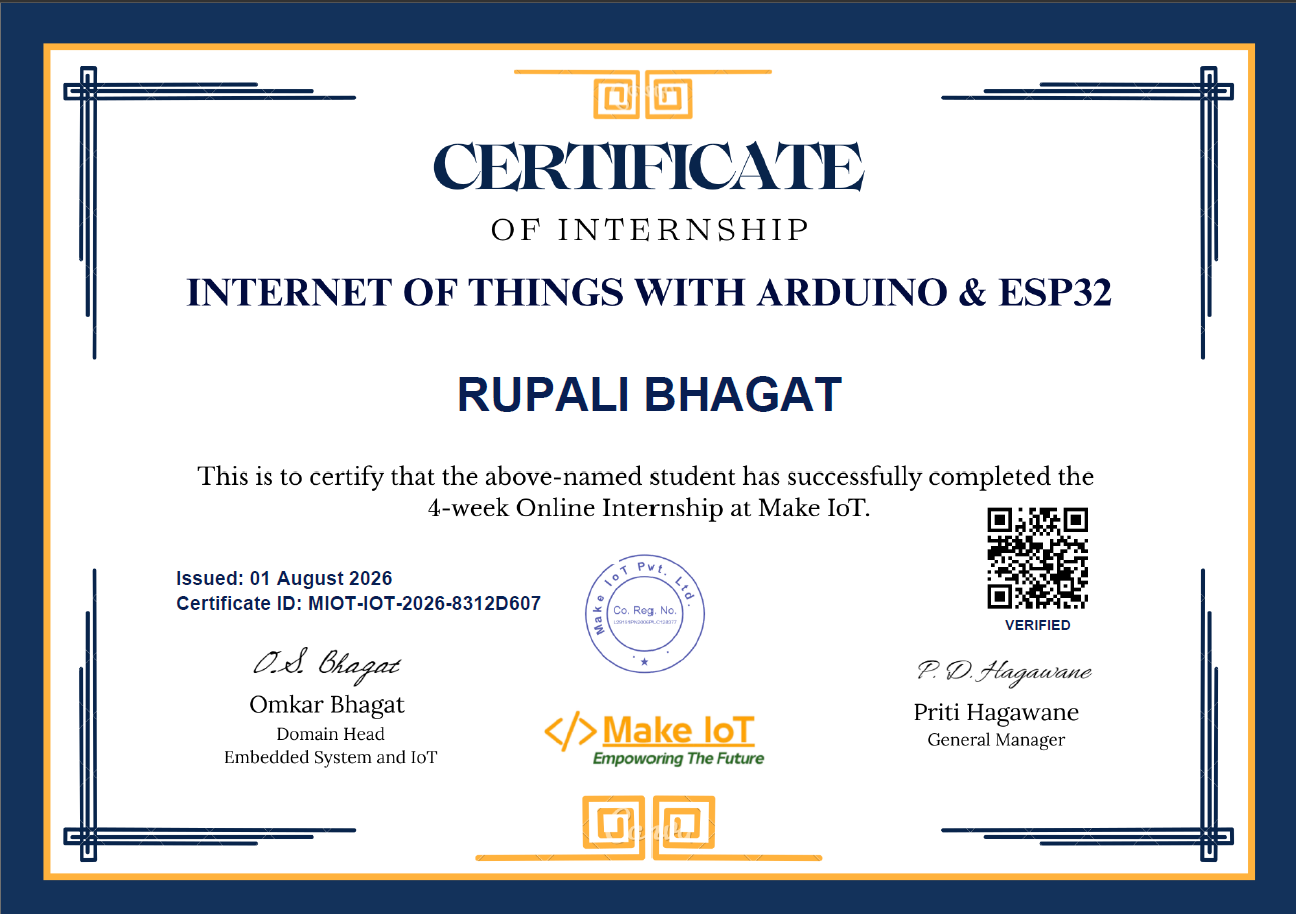
Earned after completing the internship
Complete the required internship activities and assessment to receive your completion certificate.
College
Submit your internship documentation
Use your offer letter and completion certificate as part of your college internship documentation.
Resume
Add your internship experience
Include the internship, technical skills and project work in your resume and portfolio.
Showcase your achievement
Add the internship and certificate to your LinkedIn profile to document your technical learning journey.
Complete your internship
in 6 steps.
A simple path from enrollment to certification, combining structured learning, practical work and assessment.
Register
Submit your details and choose the internship program.
Enroll & Pay
Complete your enrollment and secure your internship slot.
Get Offer Letter
Receive your internship offer letter as part of your enrollment documentation.
Learn & Build
Follow the 4-week learning path, complete exercises and work on practical projects.
Submit Assessment
Complete the required assessment and submit your project work for evaluation.
Get Certified
Successfully complete the evaluation and receive your internship completion certificate.
One payment.
Everything included.
Get ₹200, your friend gets ₹200
Share your referral code with a friend. When your friend enrolls and completes the payment using your referral code, both of you receive ₹200 as per the referral program.
Learn from real-world
embedded systems & IoT experience.

Omkar Bhagat
Founder, Make IoT
An embedded systems engineer and educator with 5+ years of industry experience across automotive embedded systems and consumer electronics.
Omkar has worked across low-level embedded development, AUTOSAR, Edge AI and IoT, with experience at organizations including KPIT and Schaeffler. He currently works with FRANKE while building Make IoT to help engineering students develop practical technical skills.
He has trained 10,000+ students through technical workshops and learning programs and also mentors innovators at AIC-ADT Baramati.
Education
Bachelor's in Electronics & Telecommunication Engineering
Master's in Digital Systems
Everything you need to know
before you enroll.
Find answers about the Arduino internship, curriculum, practical work, tools, certificate, offer letter, eligibility and enrollment process.
What is the Arduino and IoT internship?+
This is a structured 4-week hands-on internship focused on Arduino and Internet of Things systems. The program progresses from Arduino fundamentals and programming to sensors, actuators, ESP8266, IoT architecture, Wi-Fi, web servers, HTTP and IoT cloud platforms.
Who is this Arduino and IoT internship for?+
The internship is designed for engineering students and learners who want practical exposure to Arduino, embedded programming and connected IoT systems. It is suitable for beginners as well as learners who want to strengthen their hands-on IoT fundamentals.
Do I need prior Arduino experience?+
No. The curriculum starts with an introduction to Arduino, hardware, software and programming basics before progressing into peripheral interfacing and IoT development.
Do I need an Arduino or ESP8266 board?+
The internship includes simulation-based learning with Wokwi, so you can practise the covered concepts using a software-based environment. Physical hardware can be useful for additional hands-on practice, but the syllabus itself includes simulation as part of the learning path.
What will I learn during the Arduino part?+
You will learn Arduino fundamentals, different Arduino types and applications, hardware and software setup, programming basics, simulation, compiling and downloading code, digital input/output, switch interfacing, pull-up and pull-down topology, analog input/output, serial monitor, LCD interfacing, ultrasonic sensors and servo motors.
What will I learn in the IoT part?+
You will learn IoT fundamentals and layered architecture, IoT applications, ESP8266 hardware and software setup, Wokwi simulation, NodeMCU sensor interfacing, Wi-Fi basics, station and access-point modes, TCP/IP, ESP8266 web servers and HTTP.
Which IoT cloud platforms are covered?+
The internship covers Arduino IoT Cloud, ThingSpeak Cloud and Blynk IoT Cloud.
What is Wokwi?+
Wokwi is used in the internship as a simulation environment for practising Arduino and IoT circuits and Arduino code without depending entirely on physical hardware.
How much practical work is included?+
The syllabus specifically includes hands-on labs and real-time projects, along with access to ESP8266 projects and source codes for continued practice.
Is the internship online?+
The Arduino and IoT program is offered online. The syllabus also indicates online and offline modes as part of the program offering, so the applicable mode depends on the batch or enrollment option.
How long is the internship?+
The internship is structured as a 4-week hands-on program.
Will I receive an internship offer letter?+
An internship offer letter is part of the program's internship documentation process.
Will I receive an internship completion certificate?+
After completing the applicable internship requirements and evaluation process, you receive an internship completion certificate according to the program process.
Can I submit the internship certificate to my college?+
The internship documentation is intended to help students document their internship participation and completion. Final acceptance depends on your college or university's internship requirements, so students should confirm any specific documentation requirements with their institution.
Can I add this internship to my resume and LinkedIn profile?+
Yes. You can accurately include the internship, skills developed and projects completed on your resume and LinkedIn profile.
What do I receive during the internship?+
The syllabus includes structured Arduino and IoT learning, hands-on labs and real-time projects, exclusive PDFs and cheat sheets, and access to ESP8266 projects and source codes.
What is the fee for the Arduino and IoT internship?+
The online Arduino and IoT internship is ₹999 as a one-time payment.
When can I start the internship?+
You can begin the internship according to the enrollment and batch process after successfully completing registration and payment.
Is this an internship or a course?+
It is structured as an internship program that combines technical learning, hands-on laboratory work, real-time projects and internship documentation.
How do I enroll in the Arduino and IoT internship?+
Click the Enroll Now button, complete your enrollment details and proceed with the payment. The enrollment flow will open the Make IoT internship registration process.
Is there a referral benefit?+
Yes. Make IoT has a referral program where an eligible referral can provide a benefit to both the existing participant and the referred student after the referred student's enrollment is successfully confirmed.